-Brawlstorm-
Devlog 1.2: Aiming & Ragdolling
Introduction
Hello, Dylan here again!
In this devlog, I’ll walk you through one of the prototypes we developed during our first week. This particular prototype played a significant role in our decision to choose the game engine we’ll be using moving forward. I’ll share my approach, key discoveries, challenges encountered, and the conclusions I reached.
Originally, both prototypes were intended to be separate. However, as I worked on them, I saw an opportunity to combine the two to explore the potential shortcomings and challenges that might arise when integrating such mechanics together.
The Prototypes
I developed two distinct prototypes, which I later combined into a single project. The first focused on enabling a 3D character to aim along a 360° 2D axis. The second explored ragdoll mechanics.
In this section, I will walk you through both prototypes, following their respective timelines, one at a time. For each prototype, I will provide:
- A brief description of the core idea and mechanics
- An overview of the Unity prototype, along with its pros and cons
- An overview of the Unreal Engine version, along with its pros and cons
- A short conclusion summarizing the findings
360° Aim
Aiming is a fundamental aspect of fighter games. Smooth controls and dynamic character interactions can make or break the gameplay experience. In our case, developing a 2.5D fighter meant working with a 3D character constrained to a 2D axis. This raised an essential question: How should the aiming system work?
- Should we move the weapon, the arms, or the entire body?
- Would custom animations be necessary?
Initially, I wasn’t sure how to approach this challenge, so I began with some research. Let's Dive into the Unity prototype first.
Unity prototype
Initial Research and Approach
My first idea involved creating custom logic using a simple C# script. The plan was to rotate the shoulder joint based on a "Target" or "Cursor" that would follow the mouse. However, I quickly abandoned this approach after realizing its limitations and unecessary complexity.
Further research led me to discover Unity’s Aim Constraint component. The Aim Constraint allows any GameObject to orient itself toward a specified "Target", exactly what I needed.
But there was a catch.
- If I moved the weapon directly, what would happen to the arms?
- Alternatively, if I moved the arms, would the weapon still align properly?
Finding the Right Solution
This is where I found a short Youtube Playlist by TheKiwiCoder, which explained what I was looking for.
Following this guidance, I implemented the aiming system using the following approach:
- Weapon Attachment: The weapon was attached to the player character.
- Arm Alignment: The arms were linked to the weapon using a Look At Constraint to ensure proper orientation and positioning.
- Aiming Adjustment: Finally, I refined the aiming by applying the Aim Constraint to align everything seamlessly with a target.
The first step consisted of attaching the weapon to the player and linking the arms to the weapon. Most of this setup could be done directly in the Unity Editor without significant difficulty, though a few key adjustments were required.

Weapon Setup
The weapon, a simple asset, was placed as a child of the player object. You will notice the weapon has two parents:
- WeaponSocket
- An empty
GameObjectused to adjust the origin of the weapon. - Since the weapon’s default origin was in the middle, it needed repositioning to align properly with the stock.
- An empty
- WeaponPivot
- This object serves no purpose other than fixing a Unity bug. This became one of the major drawbacks of Unity in this prototype. I’ll discuss why it caused so many issues later on.
Rig Layers Configuration
To ensure smooth animation blending and precise aiming, I created three rig layers:
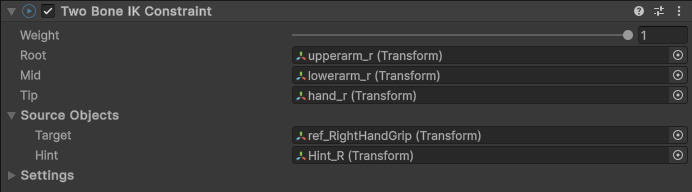
- RigLayer_HandIK
- This layer includes two Holders, one for each arm.
- Each holder uses a Two-Bone Look At Constraint, which effectively “locks” the arms to the weapon.
- The constraint takes the arm nodes and the WeaponSocket (although, due to a small oversight I assigned the grip instead, which produced the same result hehe).
- A Hint positioned on the player model influences the elbow’s bending direction.
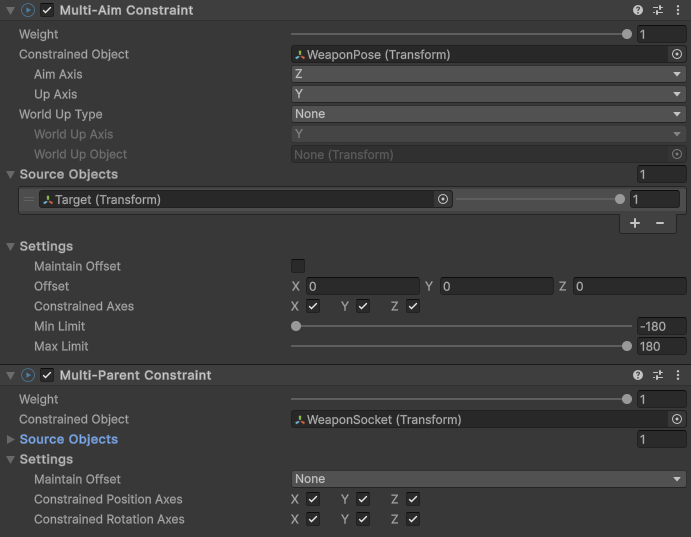
- WeaponPose
- Uses a Multi-Parent Constraint to attach the weapon to the player, ensuring it stays in the ideal position.
- This layer allows smooth animation blending, keeping the weapon correctly positioned during various movements
- WeaponAiming
- Contains the Multi-Aim Constraint, which works alongside the WeaponPose layer.
- Together, these constraints enable the weapon to aim towards the target while maintaining proper alignment with the character’s animations.
Target Setup
The target is represented by a simple square visual attached to the player. However, it also serves as the actual aim target for the Multi-Aim Constraint.
- For mouse input, a script detects the mouse position on the screen and translates it into 3D space. (Admittedly, it took me a few attempts to get it right!)
- For controller input, I implemented basic math to translate joystick rotation into target rotation around the player.
private void HandleTarget()
{
    if (_isMouseAim)
    {
        Vector3 mousePosition = Mouse.current.position.ReadValue();
        mousePosition.z = -Camera.main.transform.position.z;  // Adjusted for 2D
        _targetTransform.position = Camera.main.ScreenToWorldPoint(mousePosition);
        return;
    };
    if (_rotation.sqrMagnitude > 0.01f)
    {
        float angleRadians = Mathf.Atan2(_rotation.y, _rotation.x); // Convert vector to angle
        Vector3 offset = new Vector3(Mathf.Cos(angleRadians), Mathf.Sin(angleRadians), 0f); //  XY circle
        _targetTransform.position = _rotationCenterTransform.position + offset.normalized * 1.5f;
    }
}
Rig Builder Integration
The final step in the process was adding the Rig Builder component to the player. This brings all the individual rig layers together, ensuring the constraints, arm movements, and aiming mechanics work cohesively.
Which brings us to the final result for this Unity prototype:

Closing Thoughts
After this little journey in Unity, there are a few key points to consider.
Firstly, the prototype was relatively easy to accomplish. Very little coding was required, and given that C# is straightforward to work with, setting up the aiming system in Unity was a rather easy process overall.
As for the results, they were satisfactory. The aiming worked as intended, and the system behaved consistently. However, a recurring theme throughout this prototyping phase is that the final product still feels distinctly like a Unity game. Of course it still has some quirks and polishing needed, after all it is a prototype. Still while this is subjective, there’s a certain “Unity physics” look and feel that’s hard to shake.
The biggest issue I encountered during this process was a bug that completely broke the character, rendering it entirely static and immovable. After some debugging, I discovered the problem stemmed from Unity’s multi-parenting constraint.
As mentioned earlier, the weapon was placed inside a "WeaponPivot" parent. The sole purpose of this object was to lower the weapon one level down in the hierarchy. This workaround was necessary because without it, the weapon and consequently the player would become frozen and immovable due to the Unity bug. Yes, this is a bug in specifically in the Unity Engine.
While this solution worked, it highlighted some of the underlying quirks and limitations of Unity’s constraint system and possibly other Unity mechanisms. This factor will play a role in our eventual decision when choosing the final engine for our project.
| Pros | Cons |
|---|---|
| Solid framework with many features | Unity features can be Unstable |
| Fast & Efficient | The bones customisation is limited |
| Looks decent | Looks very Unity like |
| Easy to use Unity & C# | Moving more than just the arms requires much more work. Sacrificing Complexity for Efficiency |
Unreal prototype
Initial Research and Approach
After completing the Unity prototype and armed with answers to my initial questions, I turned my attention to Unreal Engine to see how it would handle a similar aiming system. Given Unreal's reputation for superior graphics and robust physics, I was curious to see how the engine would compare, especially since we planned to work exclusively in C++ without Blueprints, a significant challenge in itself.
My first challenge: How do I replicate the aiming system in Unreal without relying on Blueprints?
Unreal offers several built-in systems like Animation Blueprints, Control Rigs, and Skeletal Mesh Components that could be helpful. However, sticking to C++ meant I had to rely on Custom C++ classes to handle target tracking. Luckily other than game logic Blueprints are allowed making animations and such a much easier process.
Before Tackling the project in Unreal, I first set out to search for proper materials. This includes:
- Unreal Engine 5 Tutorial by Gisli's game development channel
- Set Up Static Camera from Blank Project by Eldstorm Games
- How to Make A Simple Aim Offset in Unreal Engine by Gorka Games
With this knowledge I started my prototype following these steps:
- Setting up the Camera and 2D Environment in 3D (C++)
- Established a 2D axis for player movement within a 3D environment.
- Configured the camera to follow the player, maintaining a fixed axis to simulate 2.5D gameplay.
- Creating an Aim Offset
- Designed an Aim Offset to control how the character aims based on pitch input from the controller.
- Making Three Aim Offset Animations
- Down: Character aiming downward.
- Forward: Character aiming straight ahead.
- Up: Character aiming upward.
- Creating a BlendSpace
- Developed a BlendSpace using the three Aim Offset animations.
- This BlendSpace allows for smooth blending between aiming directions based on the controller input.
- Blending the Aim Offset BlendSpace into the Current Animation
- Integrated the Aim Offset BlendSpace with the character's existing animations.
- Pitch values were used to dynamically adjust the aim direction without disrupting other movements.
- Changing the Pitch Using Controller Input
- Implemented C++ logic to map controller input to the pitch parameter.
- Adjustments to pitch resulted in fluid and responsive aiming behavior.
The Camera and Environment
The camera was my first challenge. Although it seemed simple, being my first C++ class in Unreal, it proved more challenging than originally thought:
void AAimPrototypeMap::BeginPlay()
{     Super::BeginPlay(); // Call base class implementation
    if (!StaticCamera)
    {
        TArray<aactor*> FoundCameras;
        UGameplayStatics::GetAllActorsOfClass(GetWorld(), ACameraActor::StaticClass(), FoundCameras);
        if (FoundCameras.Num() > 0)
            StaticCamera = Cast<acameraactor>(FoundCameras[0]);
    }
    if (APlayerController* PlayerController = UGameplayStatics::GetPlayerController(GetWorld(), 0))
        if (StaticCamera)
            PlayerController->SetViewTarget(StaticCamera);
}
This code, executed on BeginPlay, finds the camera in the world, retrieves the player, and sets the camera as the player's view target. The SetViewTarget function bypasses blending, ensuring the camera snaps to the desired position without an unnecessary blending animation.
While I’ll spare you the rest of the C++ code, this marked the first of many C++ experiences in Unreal.
The movement implementation wasn’t too difficult. However, changing the GameMode to work with my new controller was trickier than expected, as it required creating a new character as well. After overcoming this, I had a fully functional 2D scroller in a 3D space.
The Aim Offset Blend Space
I’ll combine steps 2-4 here, as each is relatively straightforward.
Surprisingly, setting up the Aim Offset BlendSpace was easy and highly customizable. After creating the BlendSpace and configuring the necessary variables, I made three key animations (Down, Forward, Up) by:
- Duplicating the aiming idle animation.
- Deleting all keyframes.
- Adjusting the skeleton to aim in the desired directions.
- Adding one keyframe.
Since only one keyframe was needed for each direction, adding them to the BlendSpace was a simple drag-and-drop process. The BlendSpace now allowed for 180° aiming (from -90° to 90°), and multiple bones could be modified blending the amimation into the whole body rather than the arms, giving much better results.
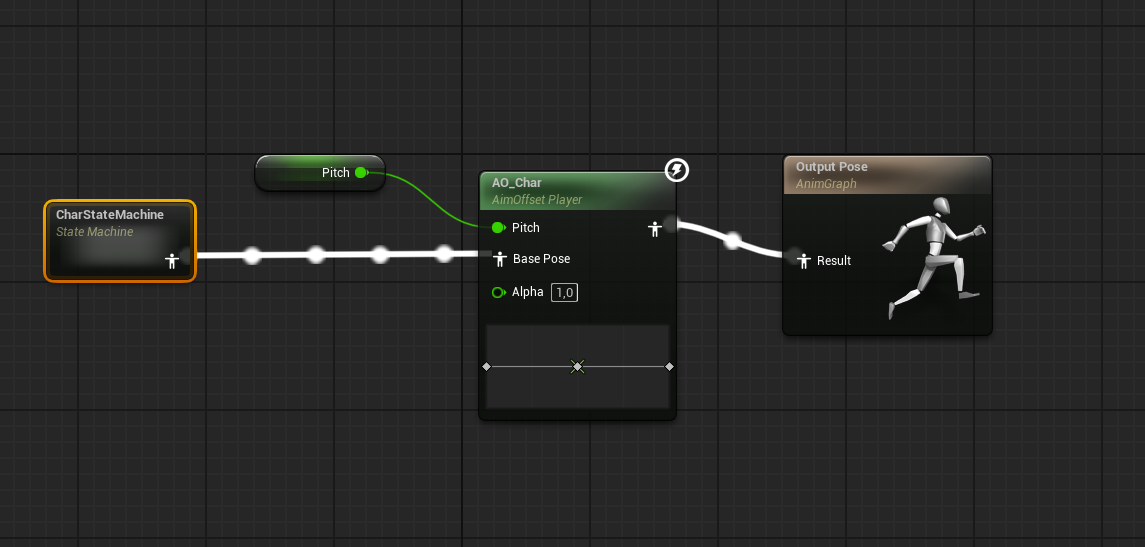
Blending the Aim Offset BlendSpace
Blending the new animation into the existing animation graph was as simple as linking the BlendSpace just before the output pose in the Animation Graph. This seamless blending resulted in smooth aiming transitions.
Changing The Pitch Using Controller Input
For this prototype, I decided against mouse controls as the game would ultimately be controller only. Here’s the C++ code handling pitch adjustments based on controller input:
void AMyPlayerController::Look(const FInputActionValue& Value)
{
     const FVector2D LookAxisVector = Value.Get<fvector2d>();
     if (APawn* ControlledPawn = GetPawn())
     {
         // Calculate angle in degrees from joystick vector
         float AngleRadians = FMath::Atan2(LookAxisVector.Y, LookAxisVector.X);
         float AngleDegrees = FMath::RadiansToDegrees(AngleRadians);

         // Normalize angle to [-180, 180] for easier comparison
         float NormalizedAngle = FMath::UnwindDegrees(AngleDegrees);

         // Determine facing direction and correct pitch if facing -X
         float Yaw = 0.0f;
         float Pitch = NormalizedAngle;

         if (NormalizedAngle > 90.0f || NormalizedAngle < -90.0f)
         {
             Yaw = 180.0f;
             // Invert pitch around 180° to fix aiming direction
             Pitch = FMath::UnwindDegrees(180.0f - Pitch);
         }

         // Apply rotation
         FRotator NewRotation = FRotator(Pitch, Yaw, 0.0f);
         SetControlRotation(NewRotation);
     }
 }
I lied more code. This time it's a bit different than Unity.
It maps the angle from -180° to 180°, rotating the player accordingly. By setting the control rotation, I could easily retrieve the pitch in the animation graph for smooth aim adjustments.
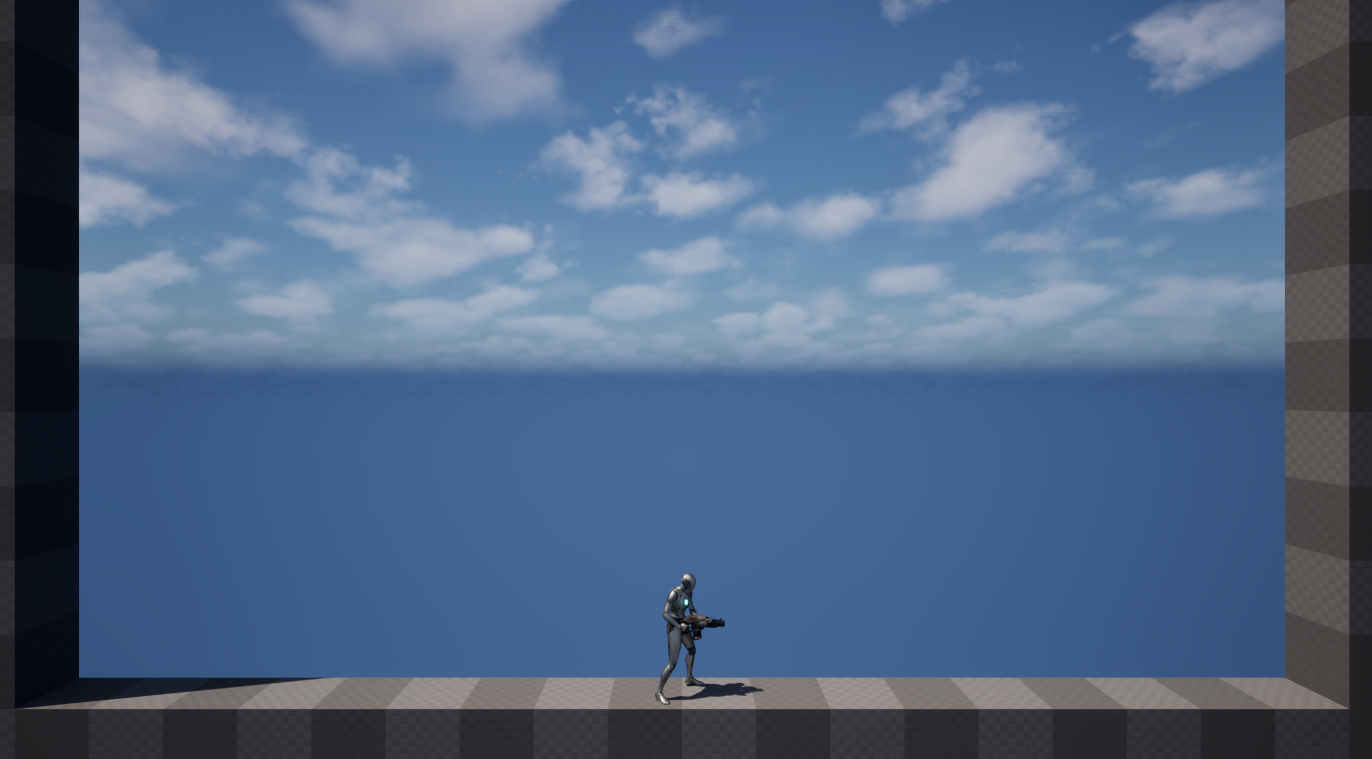
Final Result for Unreal Engine Prototype
The Unreal Engine prototype delivered a much more dynamic aiming system compared to Unity. The animations blended seamlessly without extra bugs or complex workarounds. The customization and flexibility are exceptional, and the engine is surprisingly easy to use, aside from the complexity of C++.
Closing Thoughts
The Unreal Engine prototype showed significant advantages:
- The Aim Offset and BlendSpace provided a clean, modular way to handle aiming without extensive manual rig adjustments.
- The system felt more natural and responsive, avoiding the rigidity experienced with Unity's constraint system.
- The overall Physics system felt much better in Unreal
The biggest challenge was working entirely in C++, which proved to be more time-consuming and complex compared to Unity's C#. The prototype highlighted the additional effort required to complete the project in Unreal. However, Unreal's extensive customization options and the ease of implementing them are significant advantages. Aside from the challenges with C++, the development process was smooth, had the prototype been created using Blueprints, it would have progressed seamlessly.
Leave a comment
Log in with itch.io to leave a comment.