Devlog 6: Easter Break!
Did you miss us? Well we're back after a 3 week break for easter but rest assured we still worked on the project, let's get into it.
Art
Hey hey! Welcome to the Art side of things.
I have been finish up the character, making em look fresh and shiny and ready for the game. Rig and texture.

After some back and forth with Dylan, making sure the rig worked, I prepared the color variations for the different players, being blue, green, red and yellow. (Something that will also be represented in Mathis his shader work for the outliner)
After all this, I got to lighting the scene, making sure it hits the mood just right! Combining this with creating the platform textures, our game is starting to come together more and more, it feels nice!
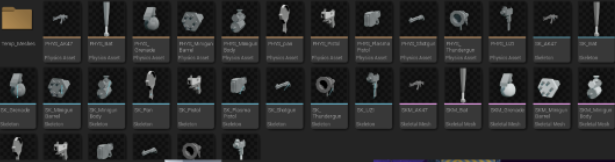
I have also made sure that all weapons are in there, textured (2/3 color flat color, does not matter from a distance to put in more detail), and usable for the programmers to be implemented with skeletons and physics assets. (A few weapons were added to the total roster as well).
I have also started working on the cards visuals but those are not really far enough in progress yet to show anything of substance, so, that'll be it for me, on to Mathis!
Hey hey, Mathis here!
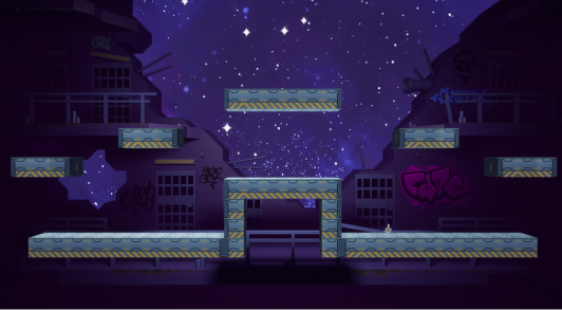
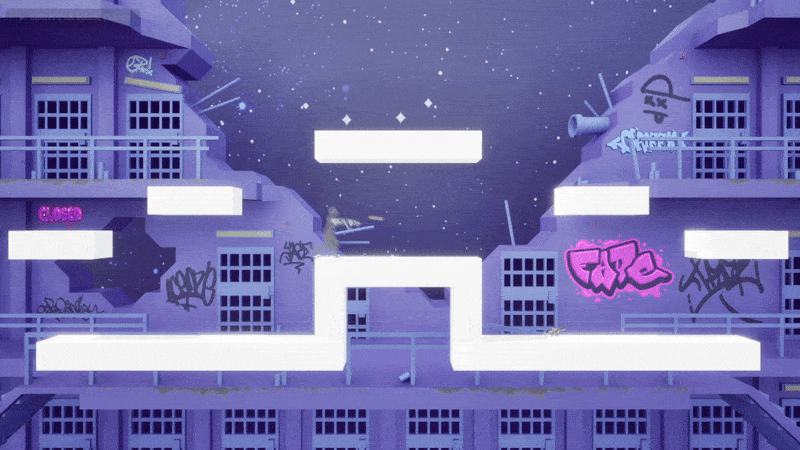
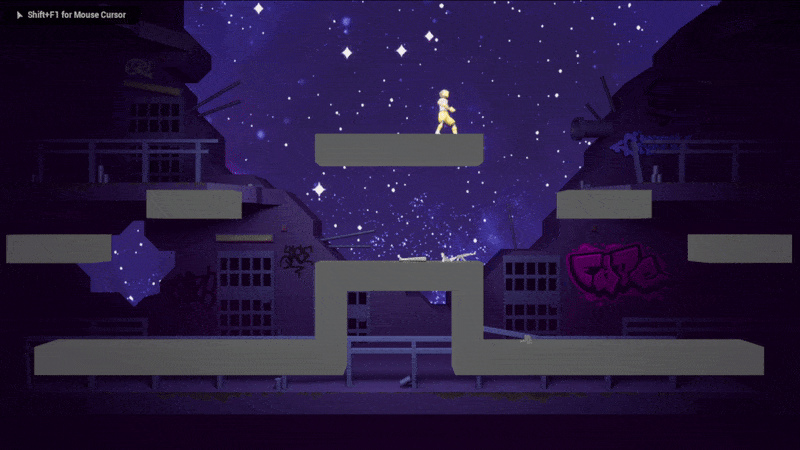
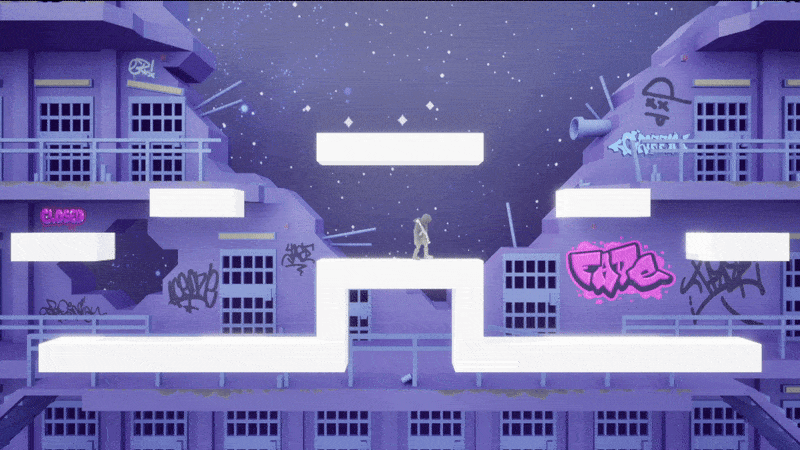
To continue where we left of last time, I finished the podium level. This ended up taking a bit more time than I had actually imagined, but I ended up being very glad with the extra time I envested because it ended up a lot better than I could have imagined!

( GIF Compression is my worst enemy )
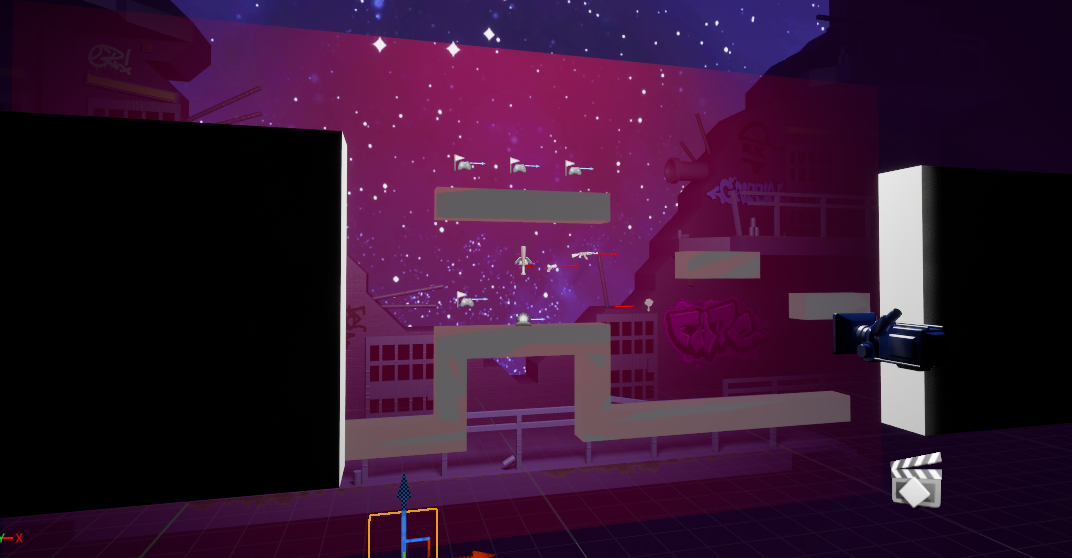
In this level I wanted to give a bit more attention to the level itself than I did with the main level. The main reasoning being that it's actually allowed here. In the main level having disctracting elements can be a big problem, here it's less of an issue. Thats why I decided to put in a bit more love for the things like the flickering sign, the trash cans surrounded by flies and stink lines, the searchlights on the background...
Combining all of this ended me up with a great final result ( for now ) where players get to show of their final placements and fight it out for a last time (;
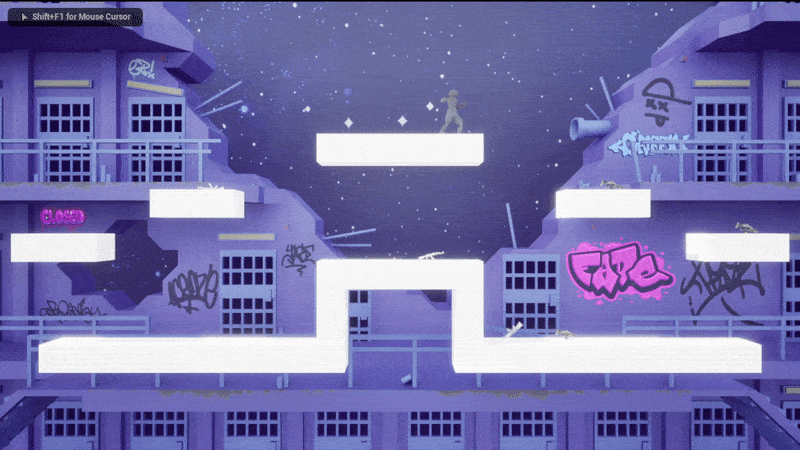
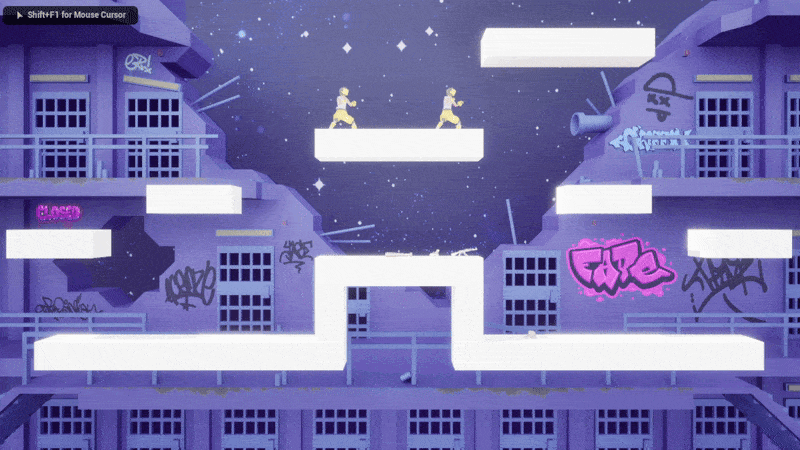
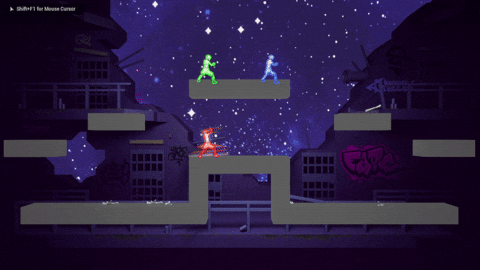
Besides that I also finally got around to making the outliner, and oh boy, that was something.

The problem with the outliner is that the original version in our prototype didn't support variations of the outliner, thus limiting us to one color. Why did this became such a pain? Because the original node-setup I had used, was very hard to then make work with this. Besides that I also realised I didn't fully nail my vision due to also higlighting edges within the model. I only wanted to show the silhouette of the models.
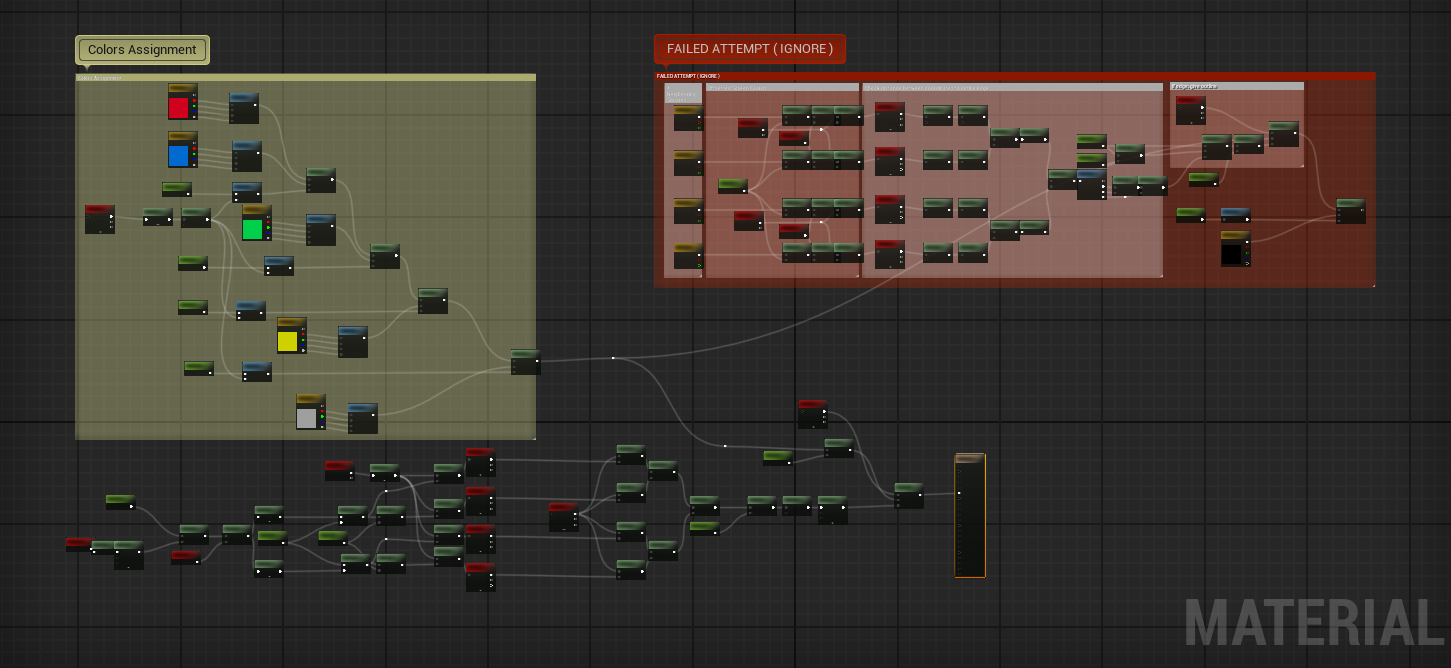
As you can see, quite some nodes were scrapped and then replaced with different logic, to further support my base idea.
As you could also see in the screenshot above this one, after a bit of tinkering I got it working perfectly!
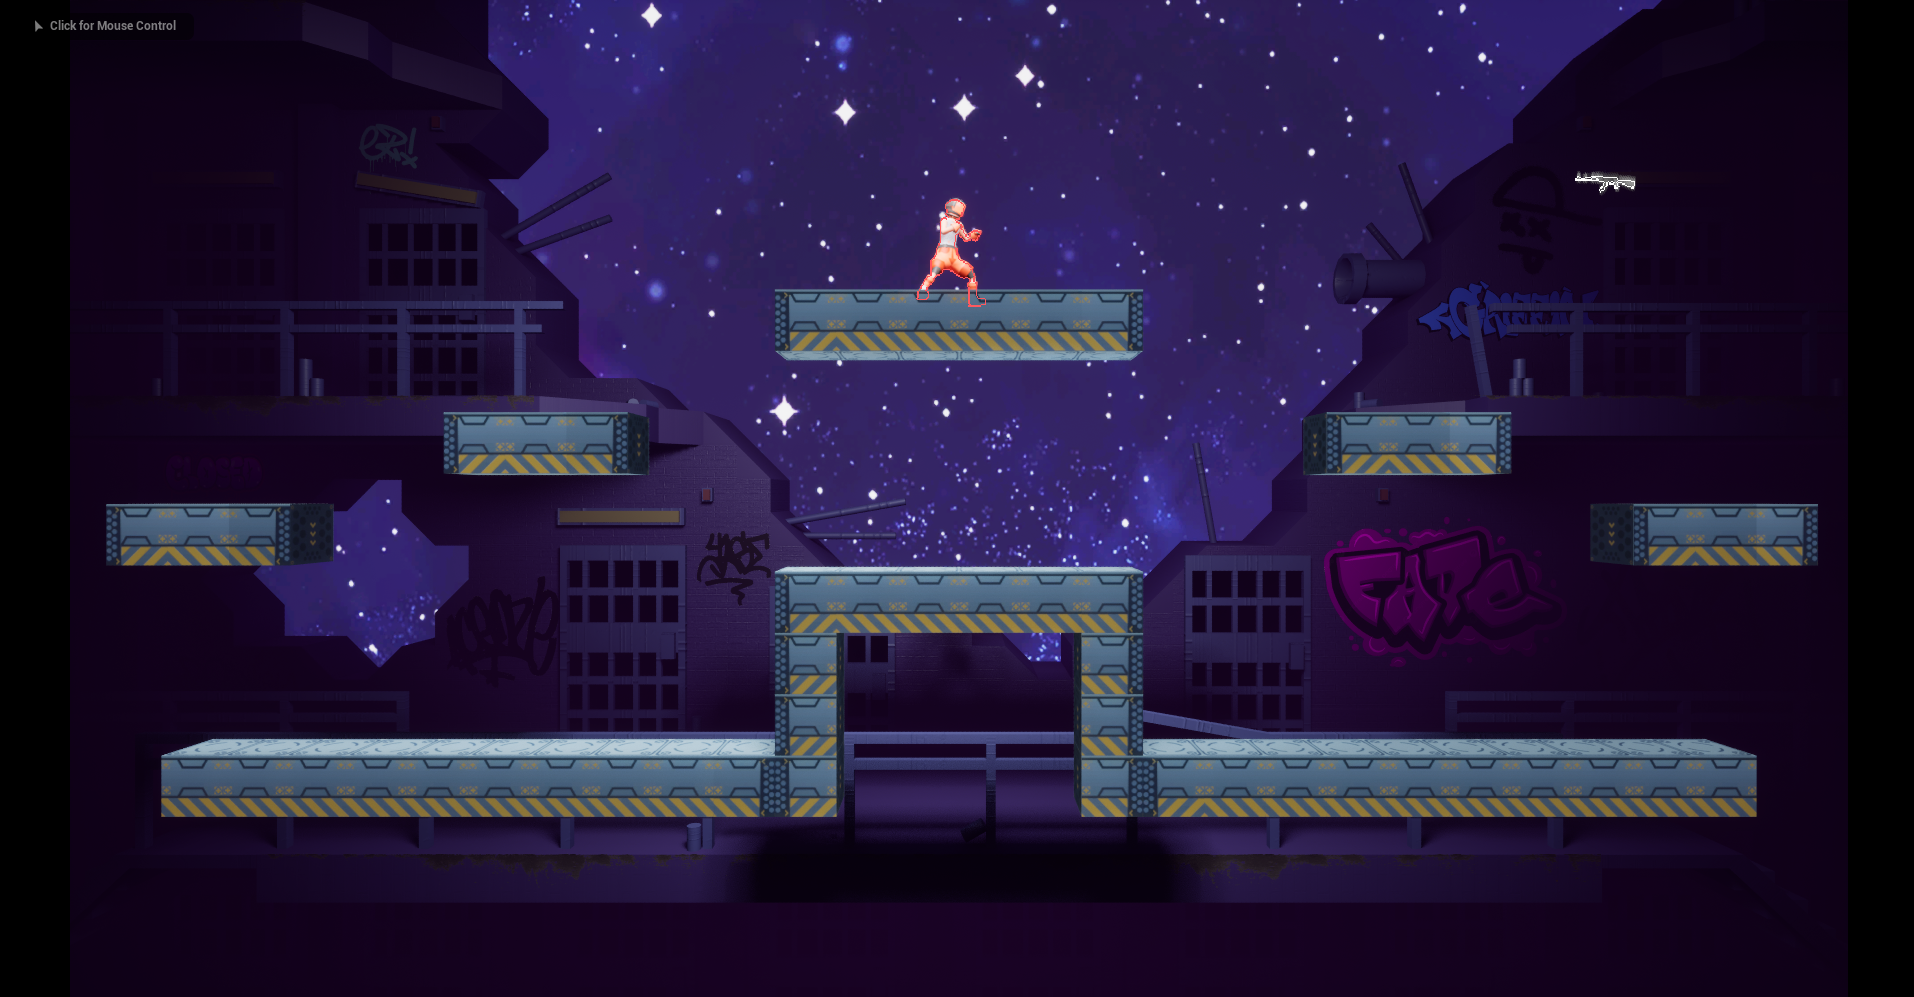
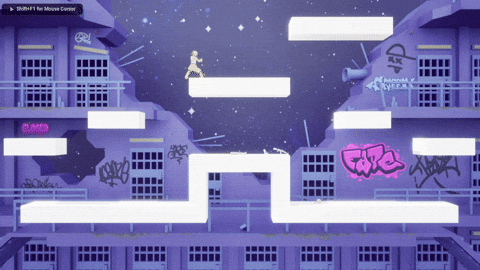
In the actual level it looks a bit like this! I tried to keep the balance between a clear outline to show where props/the players are, without drowning them in it. As a bit of a bonus, I was even able to nail that retro pixel feeling that the PS2 had!
With that done, the only level left to look after is the Join Screen, which is next on my list. See you next week, Mathis, out mic drop
Technical
Dylan
Welcome to the technical section!
I’m not quite sure where we left off last time, but after looking at the last devlog, my memory has been refreshed!
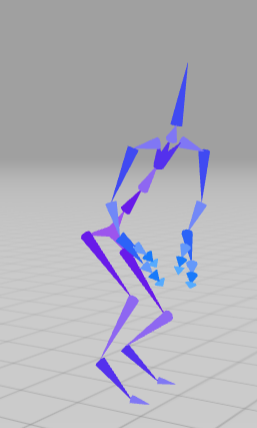
I was stuck in development because of the player's skeleton. So the first order of business was getting that skeleton rigged which our artist Laurens set out to do.
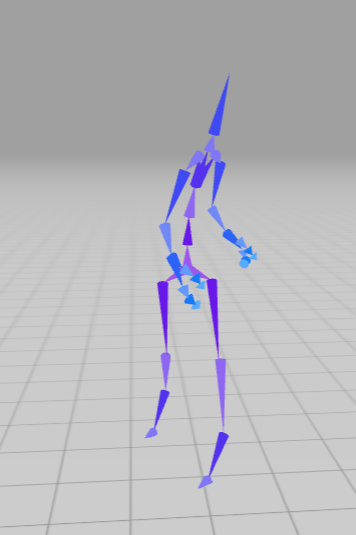
And after making sure it could twerk...
I could move on to the next steps. So what’s been done?
-
Animations and aiming are back
-
Basic animations for all weapon types
-
Fist fighting is back, or rather, kicking!
-
Melee weapons
-
Player knockback
-
Ragdolling
-
Dead Space mechanic
-
Root motion
-
Various bug fixes: skeleton, physics assets, animations, transitions, melee fighting
That’s quite a bit to cover, so let’s get into it right away!
Animations
With the skeleton in place, it was time to add animations. And less than an hour after the rig was online, our first animation was already implemented!
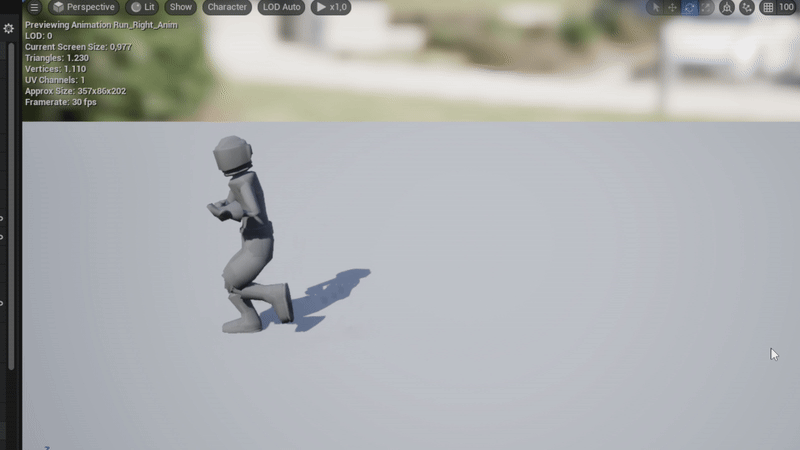
After setting up the Animation Blueprint for our character, it could finally walk around!
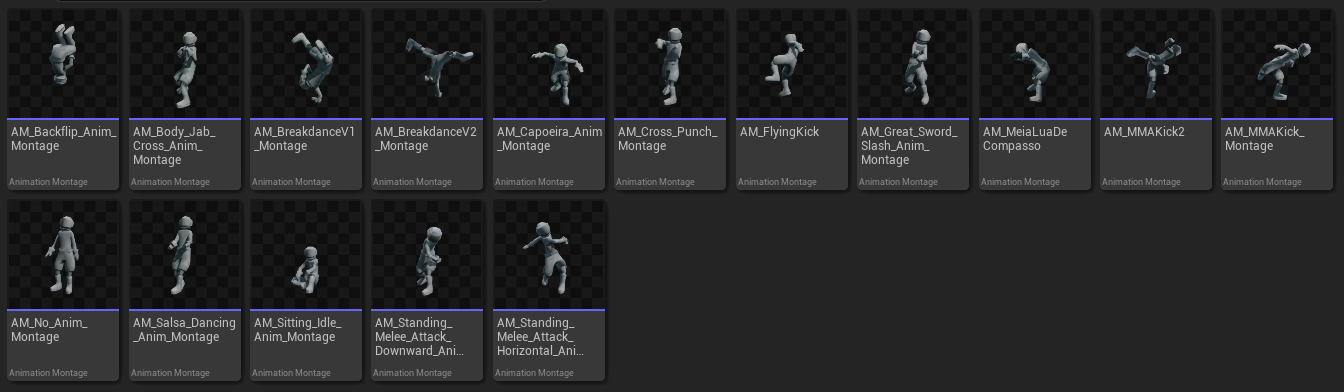
Next, I added animations for all weapon types as well as unarmed movement, with a proper state system to switch between them.
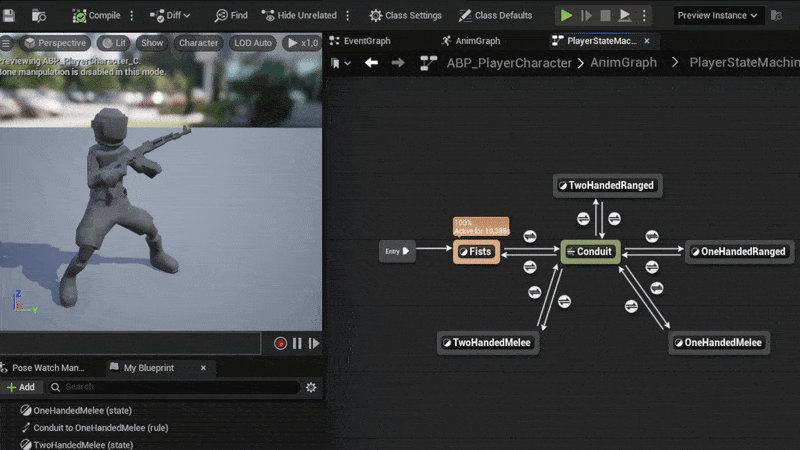
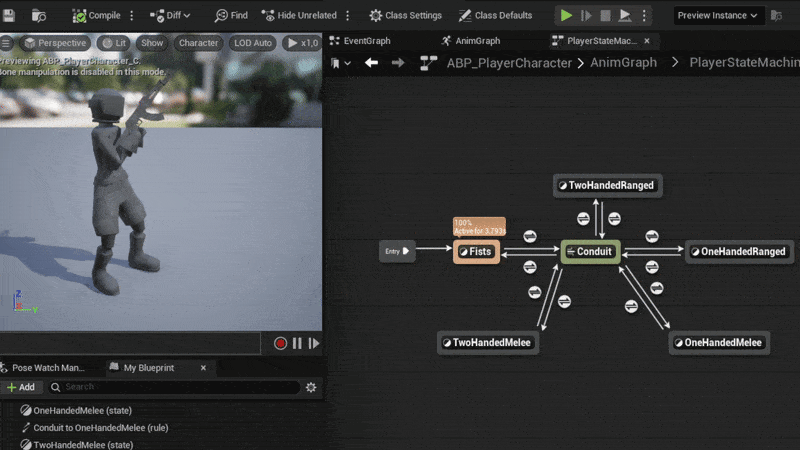
And of course, with animations in place, I couldn’t resist adding emotes.
Then came the fighting animations but more on that later under Melee Combat. I mention it here because some attacks visibly move the player forward but then snap them back. That’s due to Root Motion, which is coming up next.

Root Motion
As mentioned, root motion was essential for some of the animations but implementing it was a rollercoaster.
So what is root motion? For the uninitiated, root motion allows the animation to move the character’s root bone, effectively moving the entire player with the animation. This makes certain mechanics and movements easier to implement and more natural-looking.
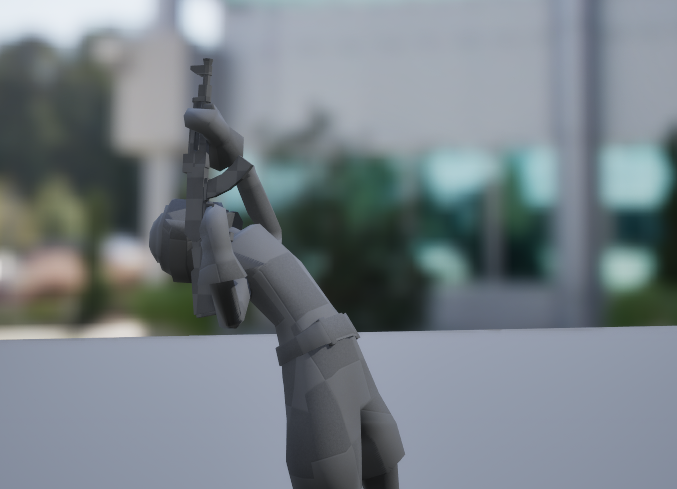
You may have noticed earlier when the player performs a flying kick, they get snapped back to the start of the animation because their actual location isn’t being updated.
With root motion, we can move the character during the animation and eliminate that snap.
I'll go into more detail in the deep dive, but here's one crucial takeaway:
Make sure your character skeleton has a root bone.
Animations without root motion work fine on skeletons that have a root, but the opposite doesn’t apply. If your skeleton doesn’t have a root bone, rooted animations just won’t work.
Adding that root bone was painful. I had to fix every single animation because I changed the skeleton structure. That’s a lot of changes.

But now, we’ve got root motion fully working!

Aiming
The first task was placing the weapon correctly in the player’s hands.
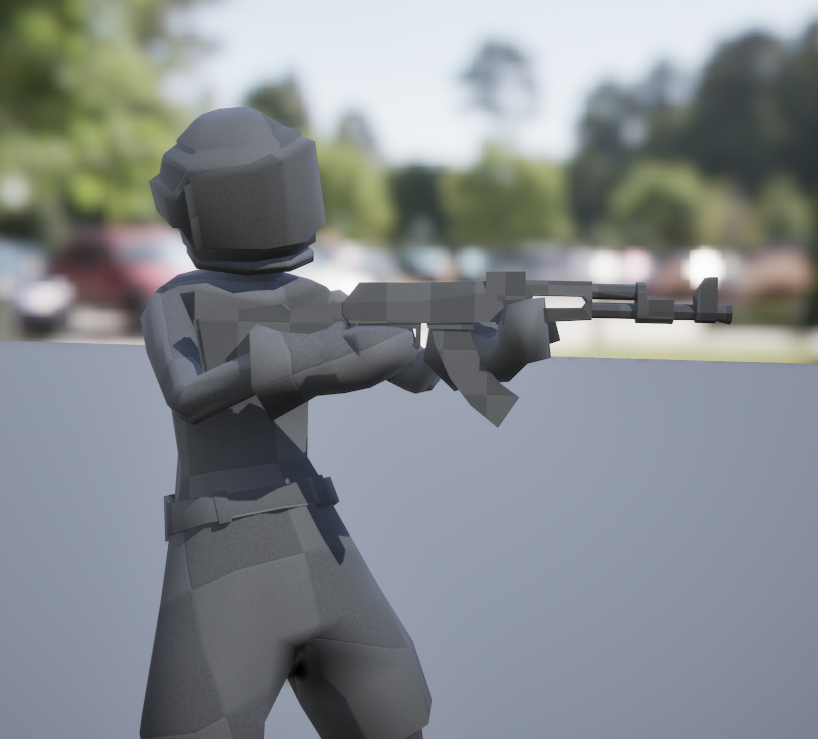
However, I soon discovered the weapon wasn’t imported correctly. So everything I’d done needed to be readjusted. But before that, here's what was initially implemented:
Just like in the prototype, I used a 1D Aim Offset, defining at least two points: one for looking up, one for down, and optionally one straight ahead to smooth out transitions.
With the help of a special tool Laurens made, I was able to fine-tune aiming even more precisely.

And with everything combined, Aiming is back!
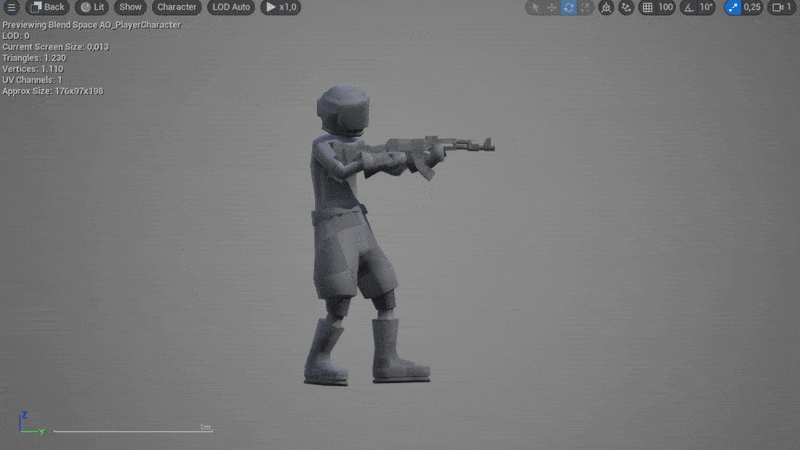
It’s not quite perfect, but at range it looks great. If needed, I can always add more offsets for smoother interpolation.
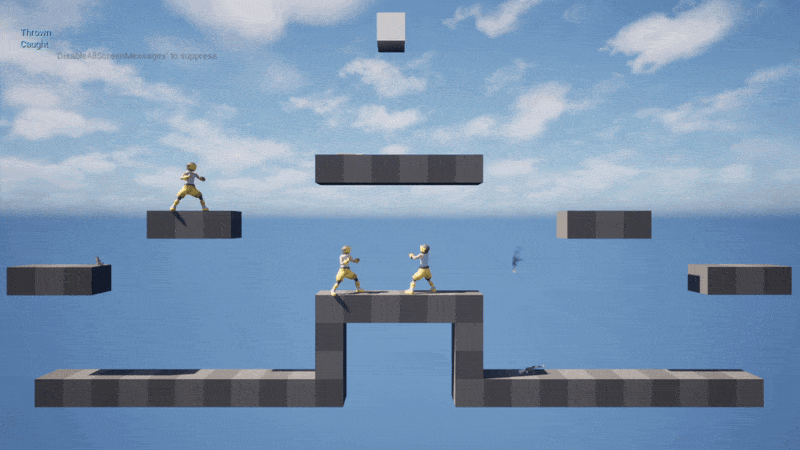
Melee Combat
For melee combat, I followed the same approach as in the prototype:
When a melee attack is triggered, player input is temporarily disabled and re-enabled when the animation finishes. Because of that, animation timings are crucial. We don’t want players stuck in place too long with every attack!
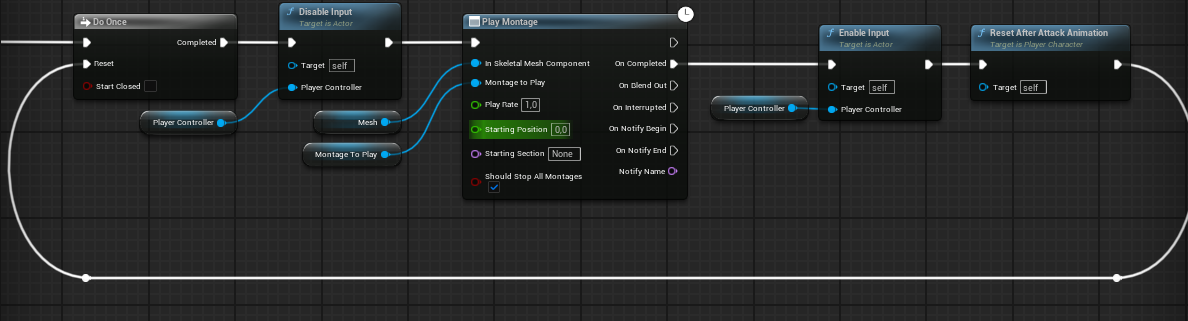
Once again, I added colliders on the player’s feet and hands, activating them during attacks to register hits. Melee weapons use their own physics assets as colliders.
With that, players can now punch, kick, or smack each other with weapons!
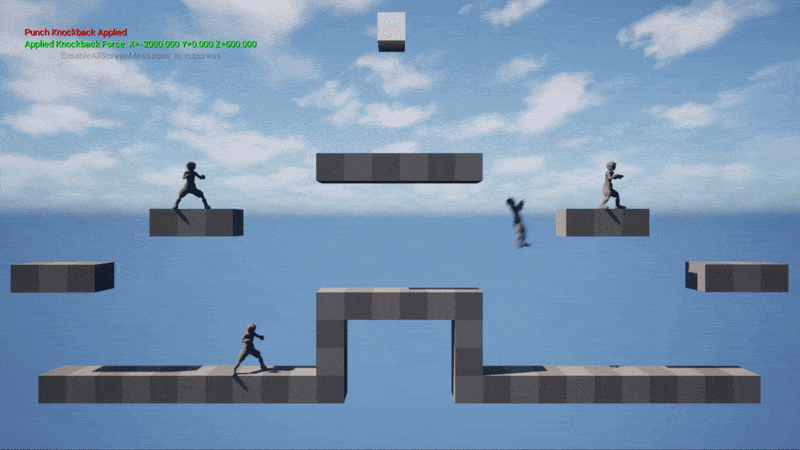
This also highlighted the need to speed up some attack animations to keep combat feeling snappy. It’s also when I started testing knockback, which brings us to the next section.
Knockback
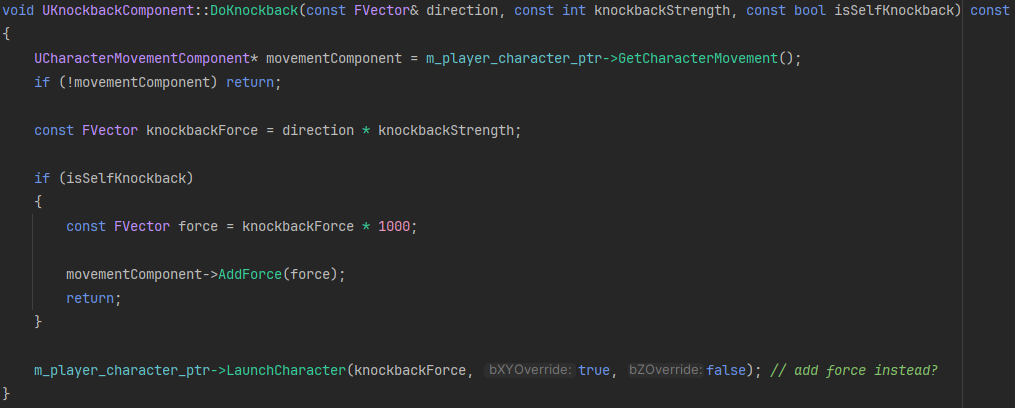
Let me know how many times I mentioned it but once again similar to the prototype, Knockback is handled with a custom C++ component.
The prototype helped me identify the best behavior:
-
When the player applies knockback to themselves, it’s handled as a force
-
When knockback is applied to others (from punches/kicks), it’s handled as a launch
Simple and effective.
Ragdolling
Ragdolling was re-implemented around the same time as knockback. I don’t have a gif, but the system is straightforward: when a player dies, ragdoll is applied.
Right now, it lacks polish (no directional force, for example). Later, I plan to apply force to the nearest bone at the hit point, for more realistic reactions.
Funny enough, ragdolling broke at some point and we’re still debating whether to fix it. It kinda fits the "no gravity" vibe of a space prison.
Intermission – Color Wars
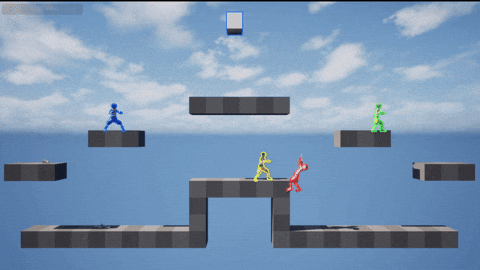
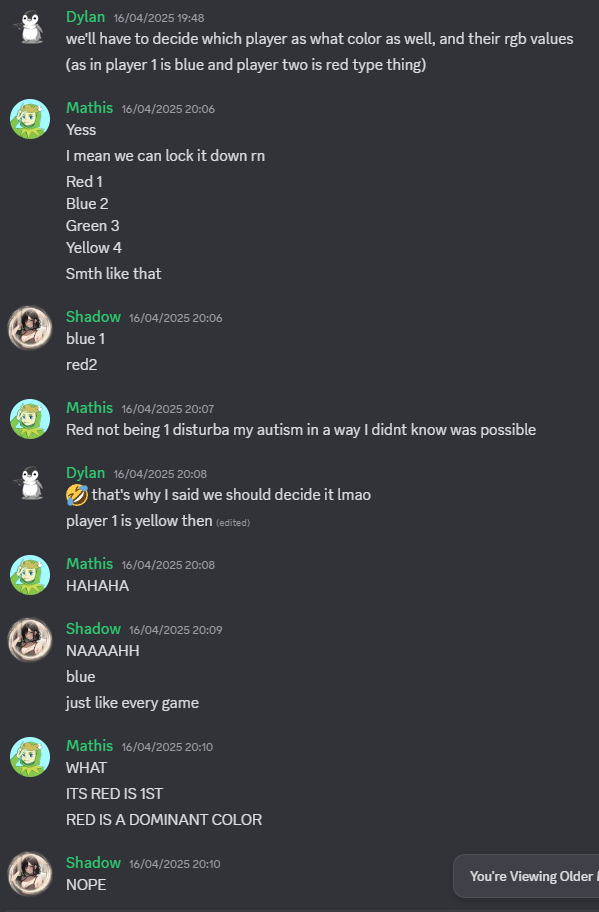
During testing, we realized that all players looked the same, making them hard to distinguish. So we had to discuss colors.
It was a bloodbath.
Which color should player 1 be?
Eventually, Player 1 claimed red. With outlines and color assignments in place, players were finally visually distinct.
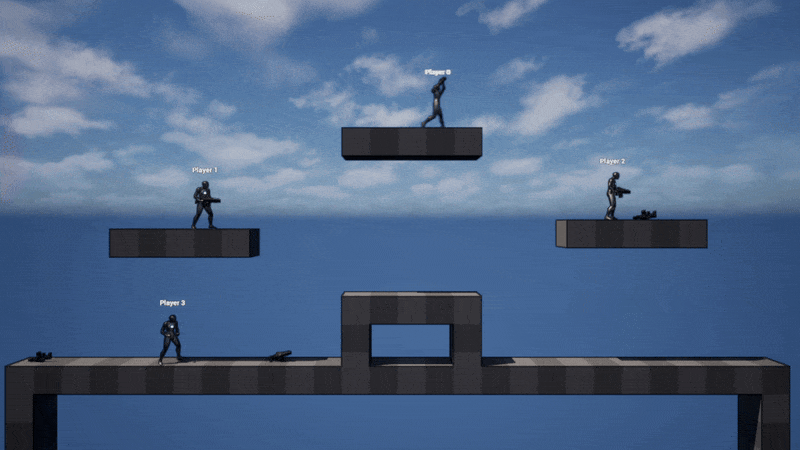
Dead Space
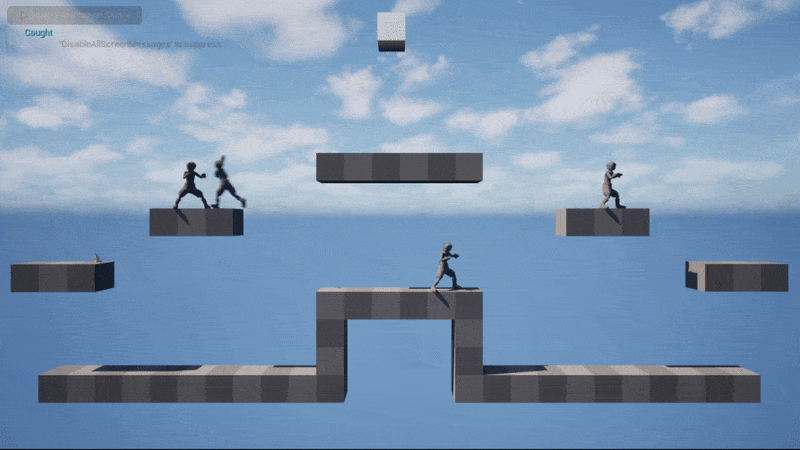
I learned a lot from the prototype about implementing the "Dead Space" mechanic. I reused the final system from that version: a playable area collider that triggers an event when players leave it.
The indicator system changed a bit. Now it consists of:
-
An arrow pointing toward the player
-
A circle that scales based on distance from the play zone
We still need to finalize the timer, possibly as a progress bar either standalone or integrated into the icons.
Rotation logic has also changed. In the prototype, the arrow rotated based on the player's position relative to screen center. But this caused slight offsets. As a refresher from before:
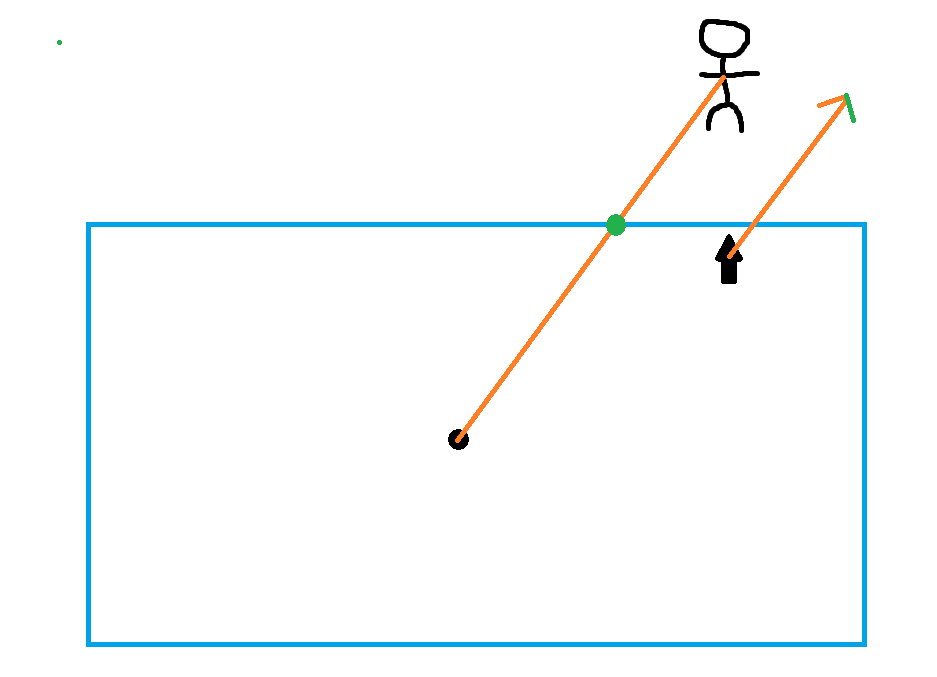
A potential fix would be to detect where the line trace intersects the viewport. However, that's easier said than done and it would still look a bit off, as the arrow would end up being offset from the player’s true position. Unless the player is positioned at a perfect perpendicular angle from the screen center, the direction indicated wouldn't be entirely accurate.
To improve clarity, I decided to simplify the behavior:
- The arrow no longer rotates freely
- The arrow follows the player's position giving an exact idea of his position
- It only switches orientation when the player moves from top to side, etc.
This gives a more accurate sense of where the player is without weird rotations.
One last missing feature: corner detection. Currently, if a player is in a corner, the arrow may be offset by 45°. Might address that later with some other minor changes like timer, colors and sizes.
Bug Fix
There were plenty of bugs with all these new additions but I’ll save that for the deep dive. None of them were game-breaking or particularly interesting visually.
Closing Thoughts
This vacation break was a nice reset for us. We came back recharged, and not only reached the level of the prototype but even surpassed it in some areas.
There’s still plenty to fix and improve, which is our main focus for next week. After that? It’s all about new and improved content!
What’s Coming Next?
Planned fixes:
-
Apply card effects to the correct player (not always player 0)
-
Rearrange level to better use core mechanics like dash, knockback, wall jumping
-
Strengthen the dash, it currently lacks impact
-
Show who’s picking cards more clearly: larger score panel, colored backlight, etc.
-
Fix joining screen locking players at (0,0)
-
Fix weapon pickups getting stuck in geometry
-
Decide whether to keep or change ragdoll physics (gravity/no gravity debate)
-
Improve weapon throwing (inconsistent behavior, unclear damage)
-
Fix podium collision
-
Frozen floor doesn't reset on full loop
-
Smooth player 180° turns (currently instant and jarring)
-
Test and improve wall jumping (not impactful, doesn’t refresh dash)
-
Investigate why all animations are bent sideways
-
Unarmed attacks: use trace or delay to prevent instant damage?
-
Clean up unused melee colliders
That wraps up this week’s devlog!
If you're here for the nitty-gritty, stick around for the deep dive. Otherwise, see you next week!
Technical Deep-Dive
Dylan
Welcome back to the Technical Deep-Dive!
Let’s kick things off with the animations.
As always, the code is decoupled using events. So, if I don’t explicitly mention how something is triggered, just assume it’s being fired or handled through an event system behind the scenes.
Animations
For those who’ve been following previous devlogs, a lot of this might look familiar because a good chunk of it isn’t new! But it's a core part of the system, and this week we’ve added even more polish and flexibility.
To set up our animation system, we need three main components:
-
An Animation Blueprint
-
An Aim Offset 1D
-
Blend Spaces
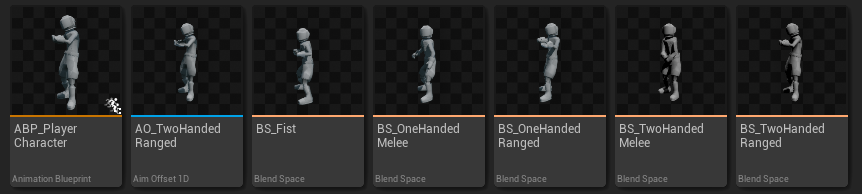
Let’s break these down:
Animation Blueprint
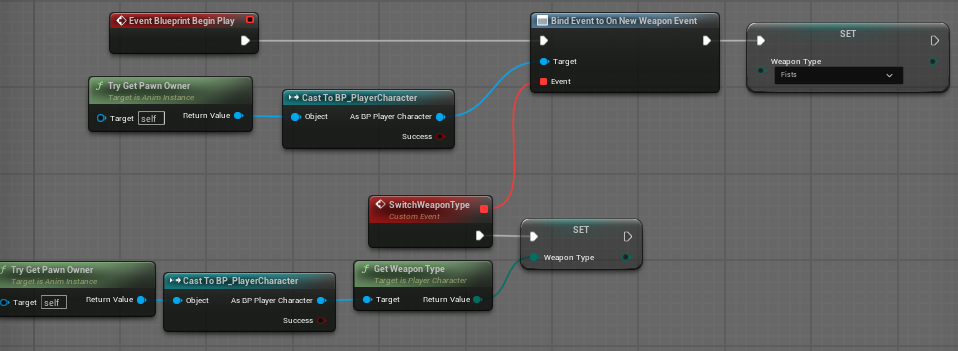
First, we listen for an event to assign the weapon type, and we gather the player’s pitch and movement speed.
In the Animation Graph, we include:
-
A Player State Machine –> handles weapon-dependent animation logic
-
A Default Slot –> used for emotes and melee attacks
-
An Aim Offset 1D –> controls vertical aiming
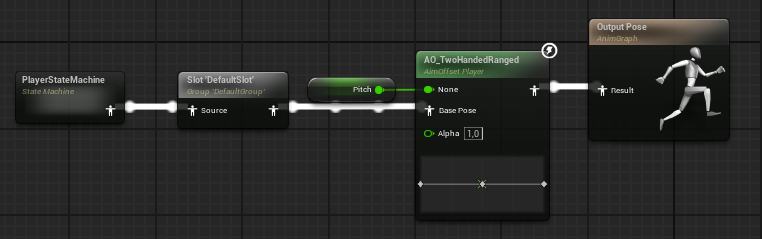
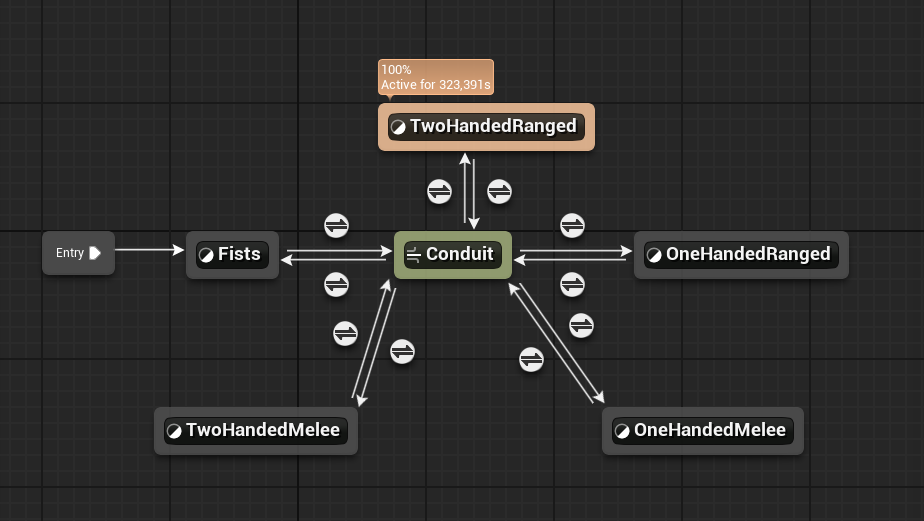
Player State Machine
This state machine selects the correct Blend Space depending on which weapon is equipped.
Blend Spaces
Each blend space includes three animations:
-
Idle
-
Walk Forward
-
Walk Backward
These are mapped based on player speed and direction.
The weapon type is defined per weapon and is broadcast via an event when the player picks one up.
For melee animations, we use animation montages, triggered when needed (more on that in the Melee Combat section).
Nothing too wild here but with that base laid down, we’re ready for something trickier: Root Motion.
Root Motion
Adding a root bone to your skeleton can actually be done right in Unreal Engine!
I followed a Video Tutorial I found, and while the idea seemed simple, it turned out to be much harder than expected. One step required repainting the weights on the hips.
At first, I skipped it because what even is bone weighting, right?
Big mistake.
Skipping it broke all the animations.
Turns out, bone weights define how much influence each bone has on the mesh, and messing them up throws everything off. After some research, I learned you can retarget or transfer weights from an existing skeleton.
So, I used a previous version of the skeleton to:
-
Copy the correct weights
-
Delete the old (broken) skeleton
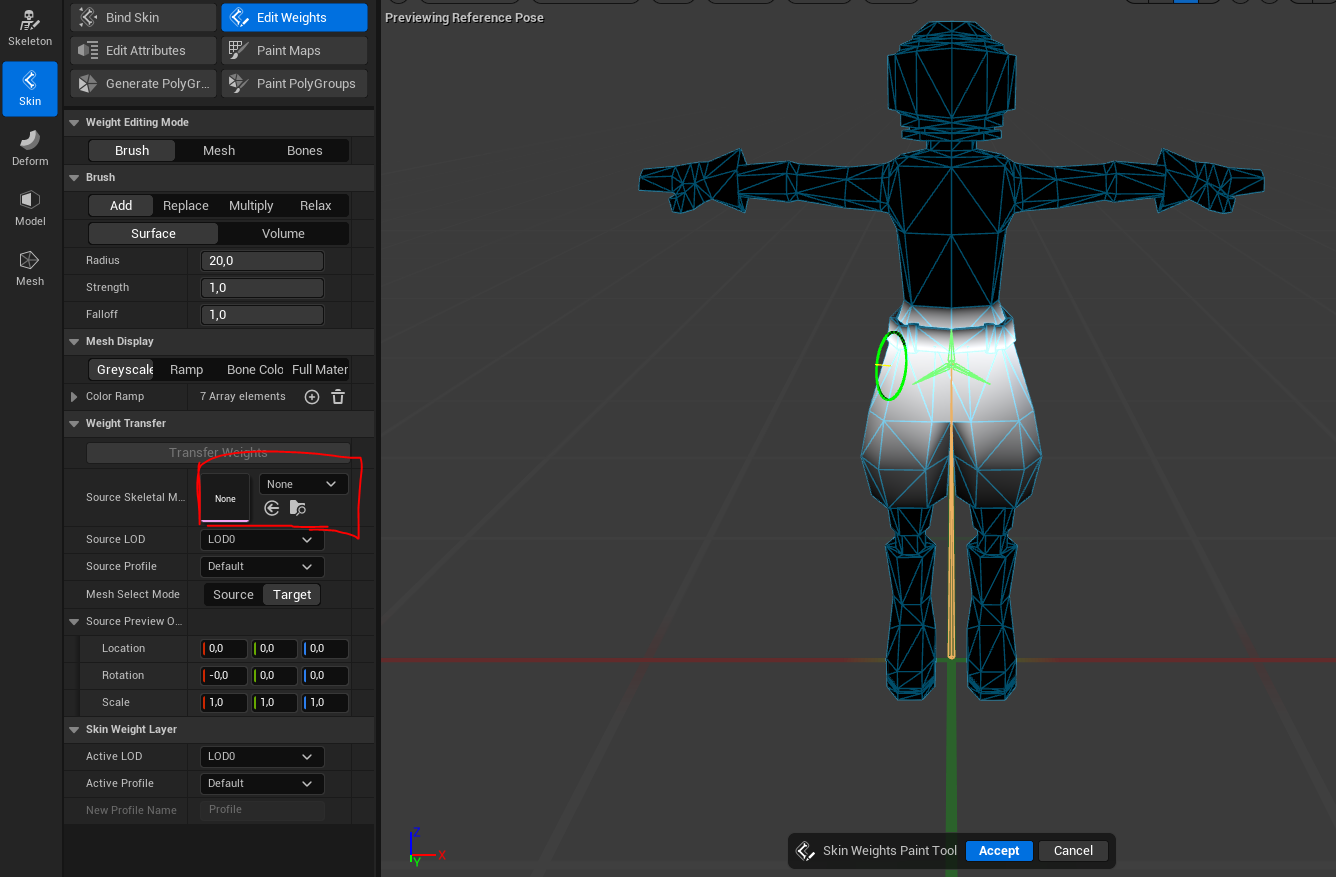
Once that was done, I had to retarget every single animation, since they were rigged to a different skeleton.
To make things even more fun:
-
Mixamo animations often claim to have root motion, but they don’t always behave properly.
-
I had to fix these in Blender, following another Video Tutorial.
Each animation needed custom import settings depending on how it would be used. I didn't have much experience here, so it was a lot of trial and error but eventually, I nailed the process.
After a mountain of tweaks, reimports, and Blender hacks, we now have a strong, flexible root motion system we can easily build on and tweak to perfect the animations as needed.
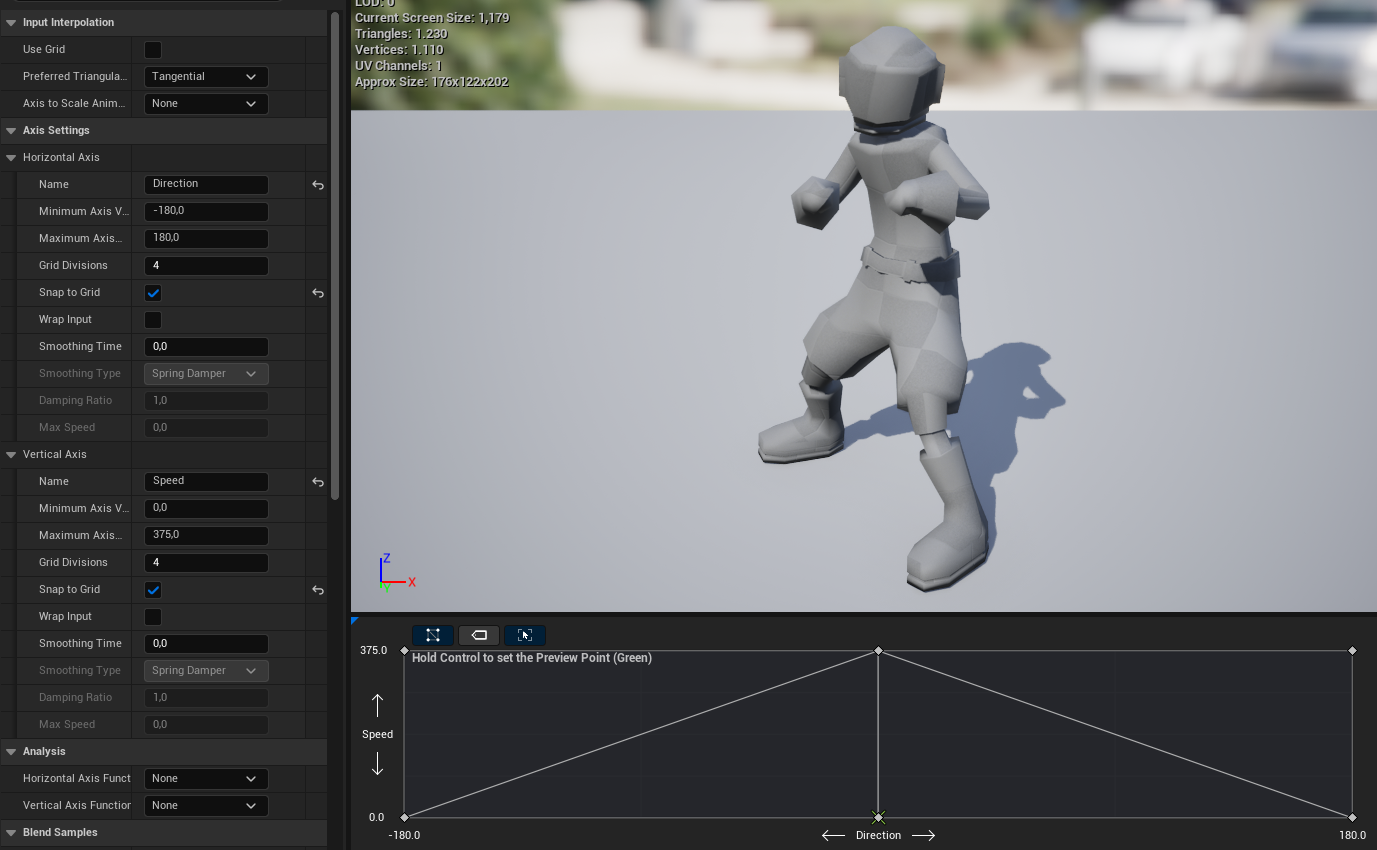
Aiming
I’ll skip most of the details here since this was already covered in Devlog 1.2 and Devlog 2.
The big issue was aiming precision. Bullets were being spawned based on the player's pitch, not the actual weapon rotation. However, weapon rotation is interpolated based on pitch and the Aim Offset Animations so it wasn’t perfectly accurate.
To solve this, there are two solutions:
-
Make the interpolated rotations more accurate. When the pitch is 90°, the weapon should also point exactly 90° upward.
-
Add more points to the interpolation, so it transitions more smoothly.
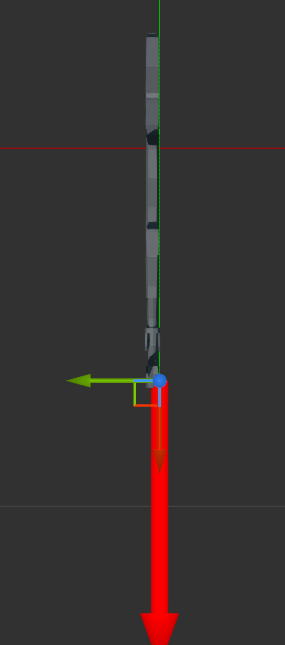
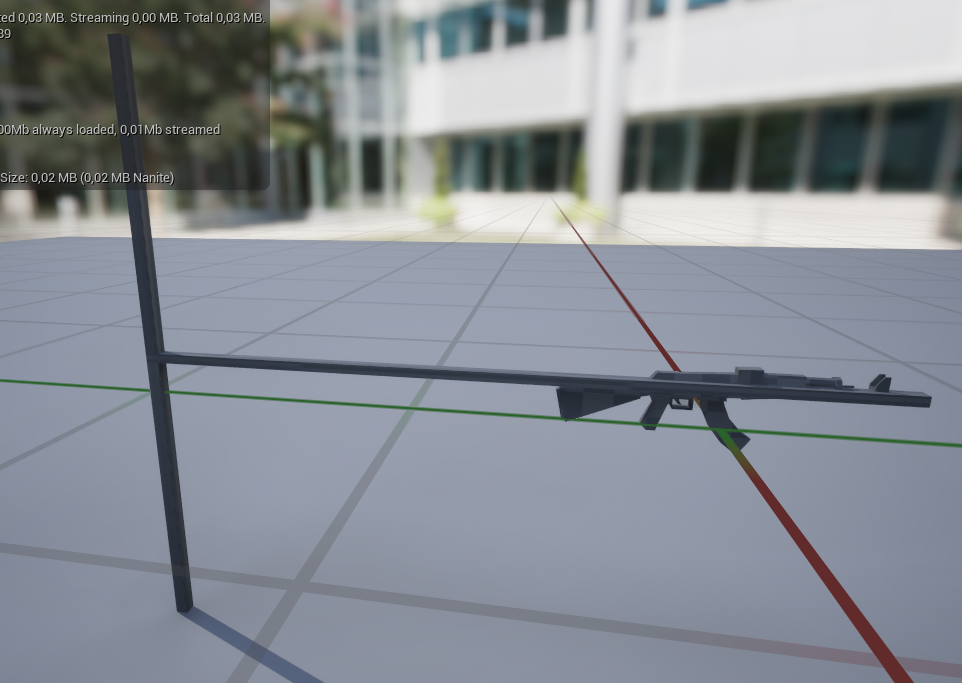
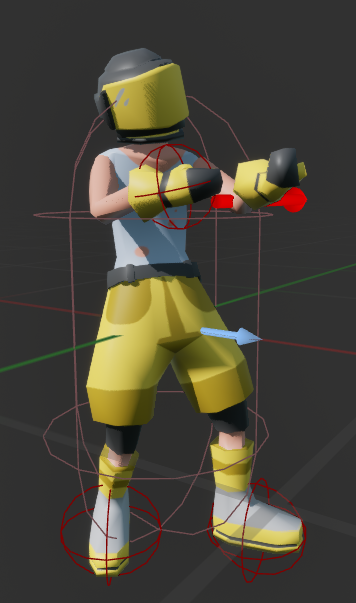
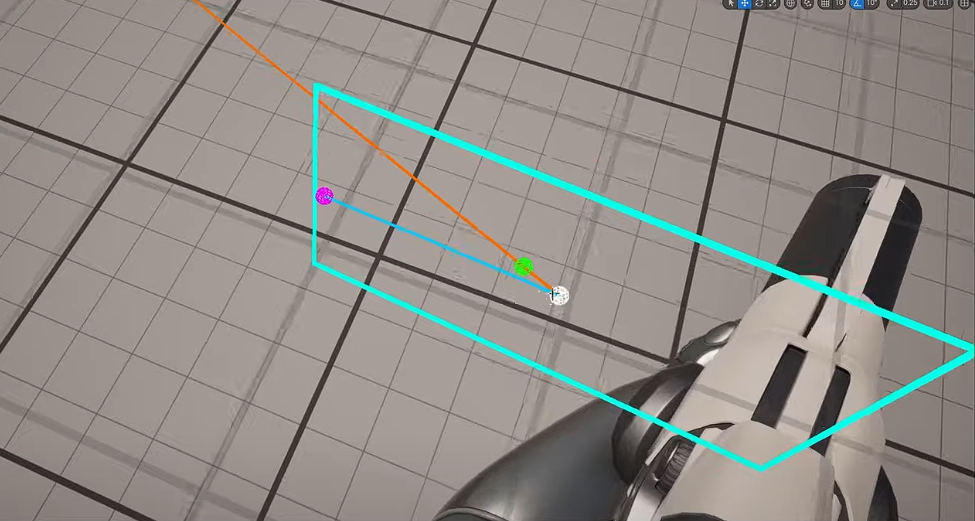
To help visualize and tweak the angles, I used a skeletal mesh provided by Laurens:

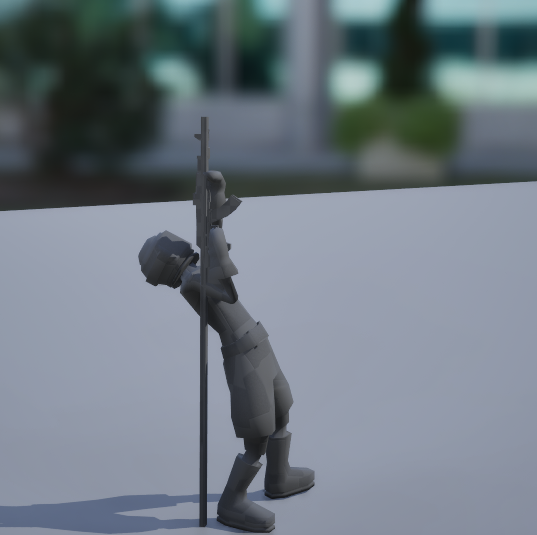
This made it much easier to estimate the correct weapon rotation. And it worked well!
Unfortunately, the import wasn’t 100% accurate, so I’ll need to re-adjust the Aim Offsets soon. Still, it’s looking much better than before.
Final Words
I’ll wrap up this week’s deep-dive a little earlier than usual. It's already getting lengthy, and a lot of what I had to talk about was covered in previous devlogs.
If you have questions, comments, or suggestions, let us know!
See you next week! 🎮
Leave a comment
Log in with itch.io to leave a comment.